This week I’m sharing a new activity each day that younger toddlers can enjoy over the Christmas holidays. Whilst I love lots of the creative activities out there designed for the under 5s, I do find quite a lot of them are still beyond the particular developmental stage of my daughter right now, so I’ve come up with a few ideas of my own, tried and tested by my very own little angel.

You will need:
- Salt-dough recipe of your choice (if you don’t have one you like, check out the many recipes on Pinterest)
- 1/2 cup cinnamon
- Mark-making tools suitable for toddlers (we have some designed for painting and playdough patterns, but a whole variety of things could be used eg. pine cones, bubble wrap, sticks, spoons)
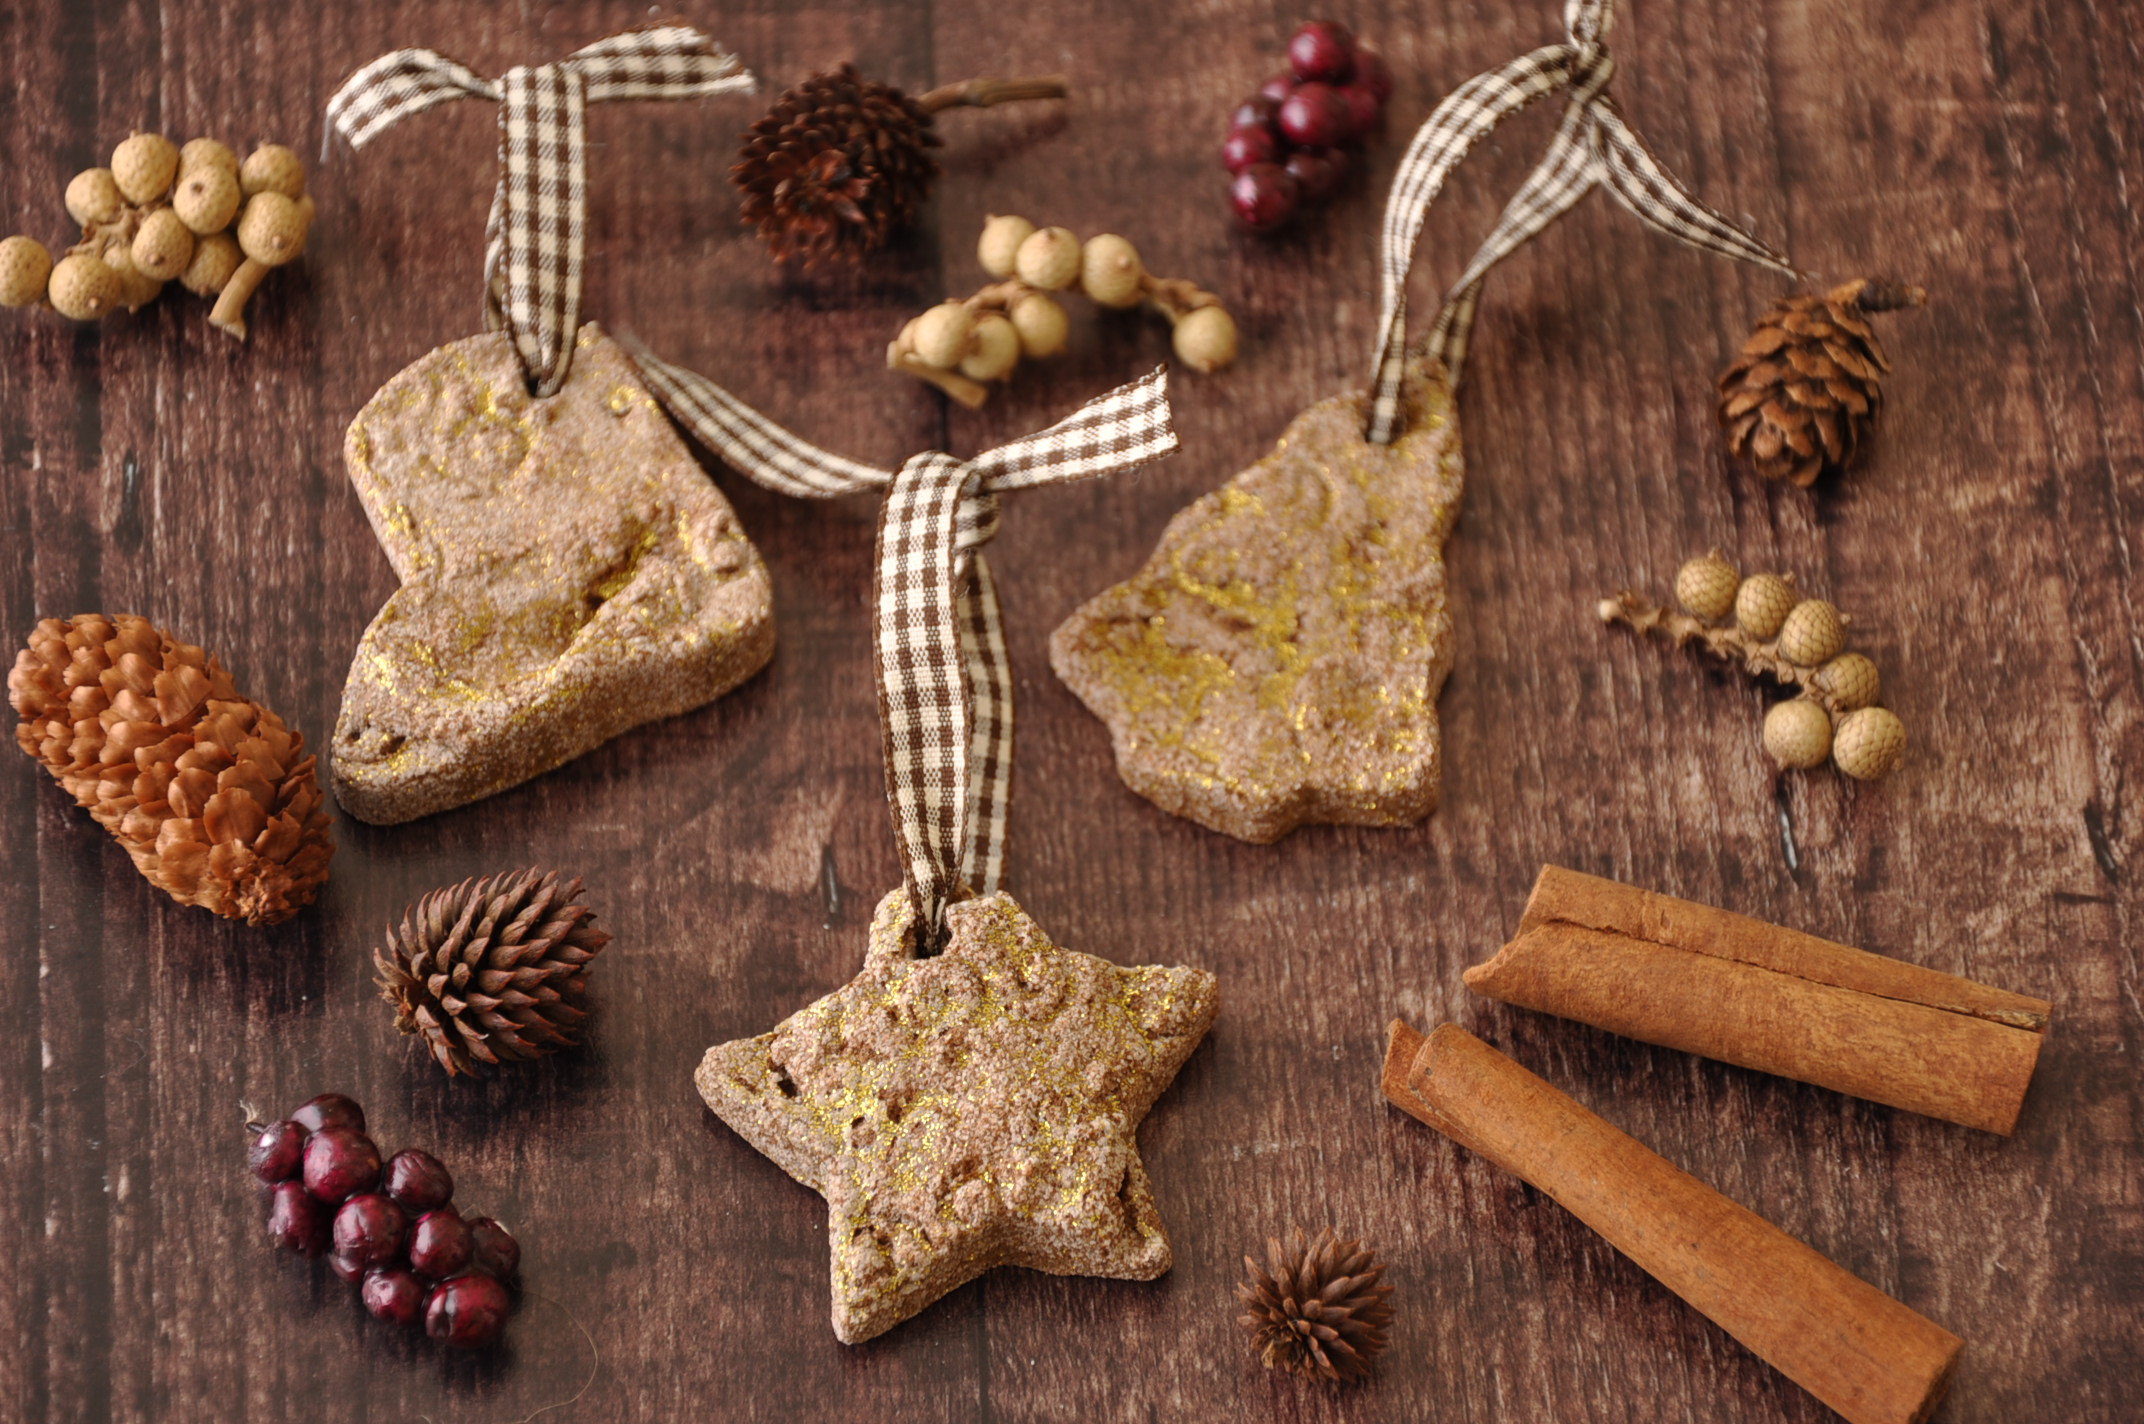
- Christmas shaped biscuit/cookie cutters
- A pastry sheet
- A chopping board
- Cocktail stick or similar (for making the hole for the ribbon)
- Varnish/PVA glue/glitter paint to finish (whatever you prefer)
- Ribbon or twine
Preparation before you start (don’t involve the kids in this bit):
Make up the dough using your preferred recipe, adding the cinnamon before making up with water.
Put your pastry sheet over the chopping board, and roll out the dough to between 5mm-1cm think.
The activity
Allow your child to explore mark-making with their hands and/or the tools you have made available, covering the rolled out dough with patterns of their own creation. Anything goes here! At this age, the fun is in the prodding and the squishing, as opposed to deliberately making recurring patterns. On this occasion, we were left with some very light and hazy marks, but the time spent manipulating the warm dough was a relaxing and rewarding experience for both of us.

To finish (again, no kids involved in this bit)
Whip the dough away and, at a convenient moment (eg. nap time) use your biscuit/cookie cutters to cut out the dough into festive shapes, capturing as much of your child’s mark-making as possible on each. Use a cocktail stick or similar to make a hole at the top of the shape (make it quite big as you’ll be threading ribbon through it later, and don’t go too close the the edges so there is no risk of it breaking once dry).
If you have the means, you could stamp the date into the back of each shape, a reminder of the exact year they were made. Very cute to look back on in years to come.
Bake or leave the shapes to air-dry (depending on your dough recipe).
Finish with a varnish of choice to help bring out the pattern, and protect the finished ornaments. I found some gold glitter paint worked really well in giving a bit of festive sparkle.
Thread some ribbon or twine through the holes you made, and all done! Some charming little keepsakes that your little one helped create. In years to come they will be able to do the rolling and cutting out, and be much more deliberate in the design, including doing all the painting etc to finish off. But at this very early stage of development, the joy is in the discovery of what they can do with the dough. A nice idea is to take a quick photo of your child playing with the dough, and print a small copy cut out to the same shape as the ornament – you can attach it with the ribbon as part of the decoration, a reminder of the moment it was made. (If you are super organised, you could laminate it first to make it more durable. Alas, I lack the technology!)
I hope you have the chance to try this out. If you give it a go, please do share using the social media buttons at the start of the article, and follow my Creative Activities for Toddlers Pinterest board, I’ll be adding more pins very soon.
Join me tomorrow for some Peak-a-Boo Christmas Cards! And if you haven’t already, check out yesterday’s post about Twinkle Star Wrapping Paper.
Amy

