Now I am a mum, I am enjoying finding ideas for crafty activities I can do with my little one, something I had really looked forward to doing when I finally had a family of my own, especially during holidays such as Christmas. But the reality is, whilst there are some lovely ideas out there, she probably needs to be a tad older to really be able to do a lot of them. As with all creative activities for children, the important bit is the process not the product, and right now my daughter’s greatest enjoyment is in the exploring and experimenting, the sussing out and simply having a go…to the untrained eye it all looks alarmingly like making one big mess!
But there is a lot going on as she squelches and splodges away with the paint, and scribbles and strikes with pens and pencils. Gorgeous stuff in its own right, but we’re not really at the stage of constructing cotton wool snowmen or collage robins just yet (not unless I kind of end up doing most of it). Maybe next year, but for the time being I have been trying out a few activities that are fully within her current capabilities, allow her freedom to engage in ways that are meaningful to her, whilst leaving me with a little something I can pass on to loved ones this Christmas to make them smile.
So I thought I’d share a few of these activities over the next five days; if you are looking for something Christmasy and creative to do with your little one over the festive season, why not give one or two a try…

At the moment, paint brushes in my daughter’s world are simply tools for loading up paint on her hands (and mine come to think of it), and doing a whole load of hand printing. So, building on this interest, I thought printing with other tools might be a nice idea. Plus, using extra large paper had a really freeing affect, her enjoyment at getting to paint on a much larger-scale than usual was really lovely to see.
What you will need:
- A small potato
- Star-shaped playdough/biscuit/cookie cutters
- Blue and white paint (or any colour combination that appeals)
- A palette or flat surface for the paints (paper plates are an option, I used a plastic lid from one of our toy boxes)
- A large roll of paper (plus four easy to clean items that can weigh the corners down)
- Newspaper or similar to cover your floor
- Wet wipes to hand for some quick cleaning up as needed
Preparation before you start (don’t involve the kids in this bit):
Cut your potato in half, and use your biscuit/cookie cutter to create star shapes in each piece. We found the easiest way to do this is to position the cutter in the potato, then turn it over onto a hard surface and push the potato onto the shape. Use a knife to cut away the excess potato, and lift off the cutter. With a bit of tidying up, you should be left with a perfect star.
Roll out the paper on the floor – if you are organised you could put newspaper down first (I wasn’t! Turned out ok, but its a bit hairy not knowing if the paint might drip on the carpet at any moment). You will probably need a few objects to weigh the corners down (I just grabbed the nearest easy-wipe toys).
Squeeze some paint out onto your chosen palette, and have your potato and playdough cutters at the ready to dip in. I find that biscuit/cookie cutters are good for creating the potato shape, but not so good for doing some printing with as they can be a bit sharp. If you use playdough cutters, they tend to be a bit thicker, so have a better surface area for printing.
The activity
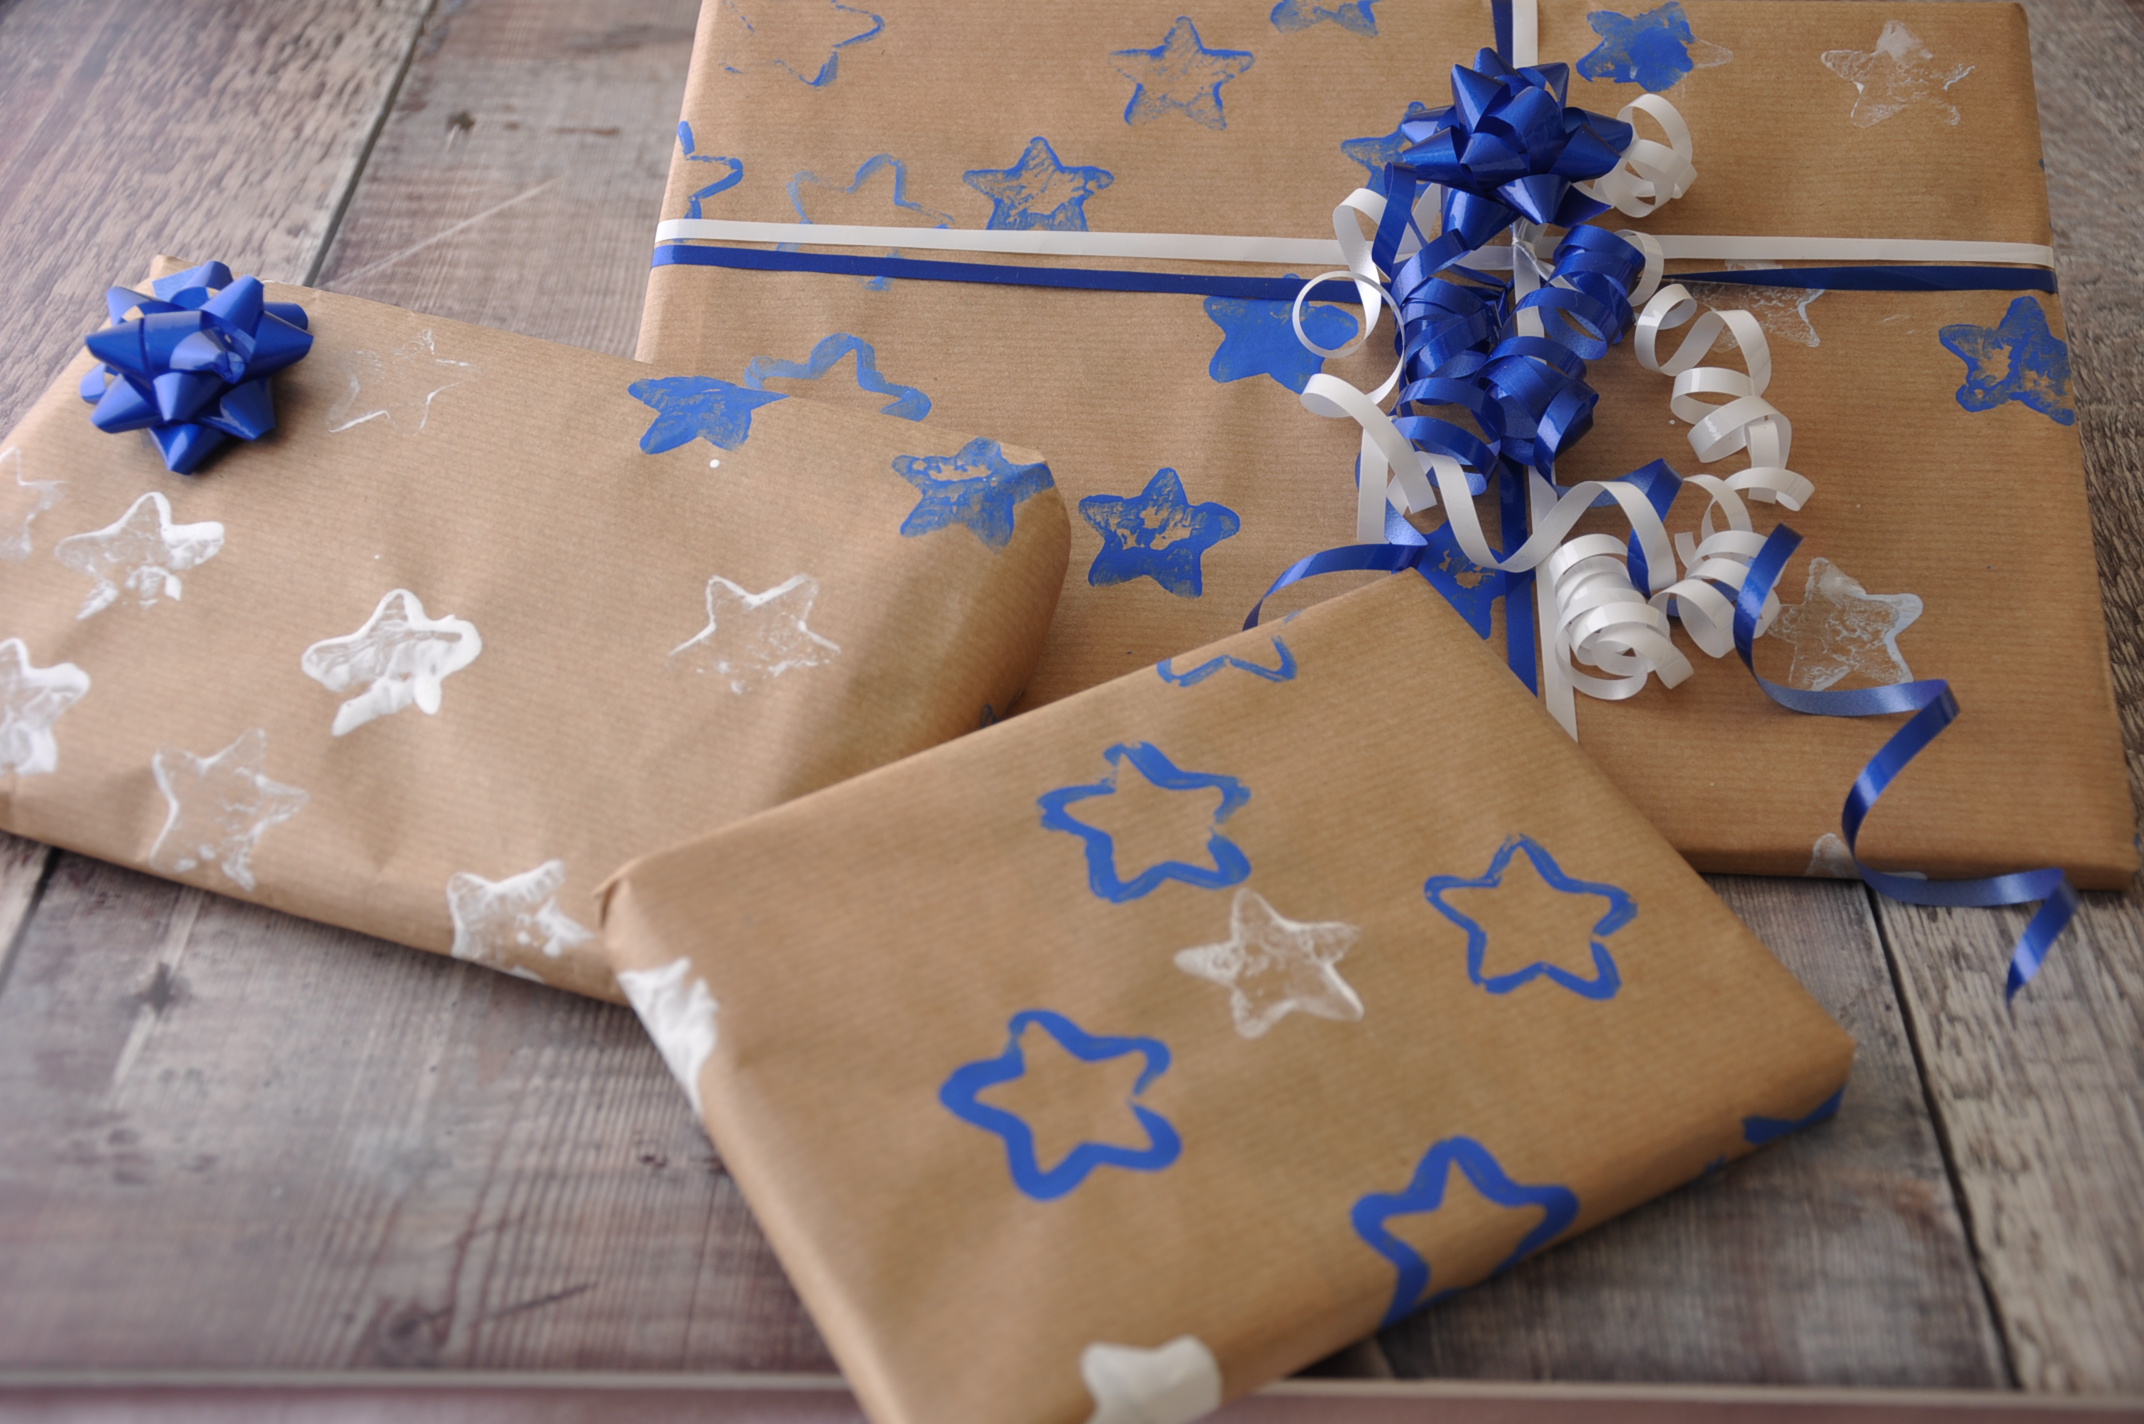
Allow your child to use the variety of star shapes and colours to cover the paper. Having such a large area to work with can be very liberating, as can having the paper rolled out on the floor rather than a table; it encourages greater movement and, in turn, exploration of what is possible. We started with a delicate sprinkle of some very close together stars, but ended with some pretty wild and care-free hand prints all along one side. My daughter experimented with mixing the colours, smudging and smearing the paints, and generally painted in a way that was freer, and encouraged her to be more engaged than I’ve previously seen. The finished result, beautiful!

Leave the paint to dry, and there you have it – a way to harness your little one’s creative talents, whilst leaving you with some of the most expressive wrapping paper you’ve ever seen.
If you give this a go, please do share using the social media buttons at the start of the article, and follow my Creative Activities for Toddlers Pinterest board, I’ll be adding more pins very soon.
Join me tomorrow for some cinnamon spice tree decorations!
Amy

