As the world grapples with the fear and uncertainty that COVID-19 has bought about, I was hunting high and low for some good news stories to share with members of my Creative Sewing Challenge. And I found a news story about the rainbows that children of Italy are drawing and hanging in their windows with the words “andrà tutto bene”; “everything will be all right”. So I created this free rainbow embroidery pattern to be part of the message of hope, and to give anyone who was seeking something to occupy their minds and hands some creative sanctuary to help keep the fears and anxiety at bay. Read on for a full tutorial, and please do share with anyone you feel would benefit.
And if you love a sewing challenge, feel free to join my Creative Sewing Challenge to stay connected with a growing community of sewing enthusiasts. We share a monthly prompt to inspire our sewing, and I keep you up to date with ideas and tutorials linked to each theme. Find out more here or sign up below:
The form you have selected does not exist.
To embroider your own Rainbow of Hope you will need:
- 18cm embroidery hoop
- Backing fabric. I’d go for a plain bright colour to help the clouds ‘pop’. If your fabric is particularly thin, you might also want to consider a stabilizer too.
- Dressmakers carbon paper and a pen or pencil
- Pins
- Embroidery threads in every colour of the rainbow – its totally your choice which, but you’ll need 7 for the rainbow, plus white for the clouds.
- Embroidery needle
- Scissors
Use dressmakers carbon paper to transfer the pattern to your fabric (or your preferred choice of embroidery pattern transfer).
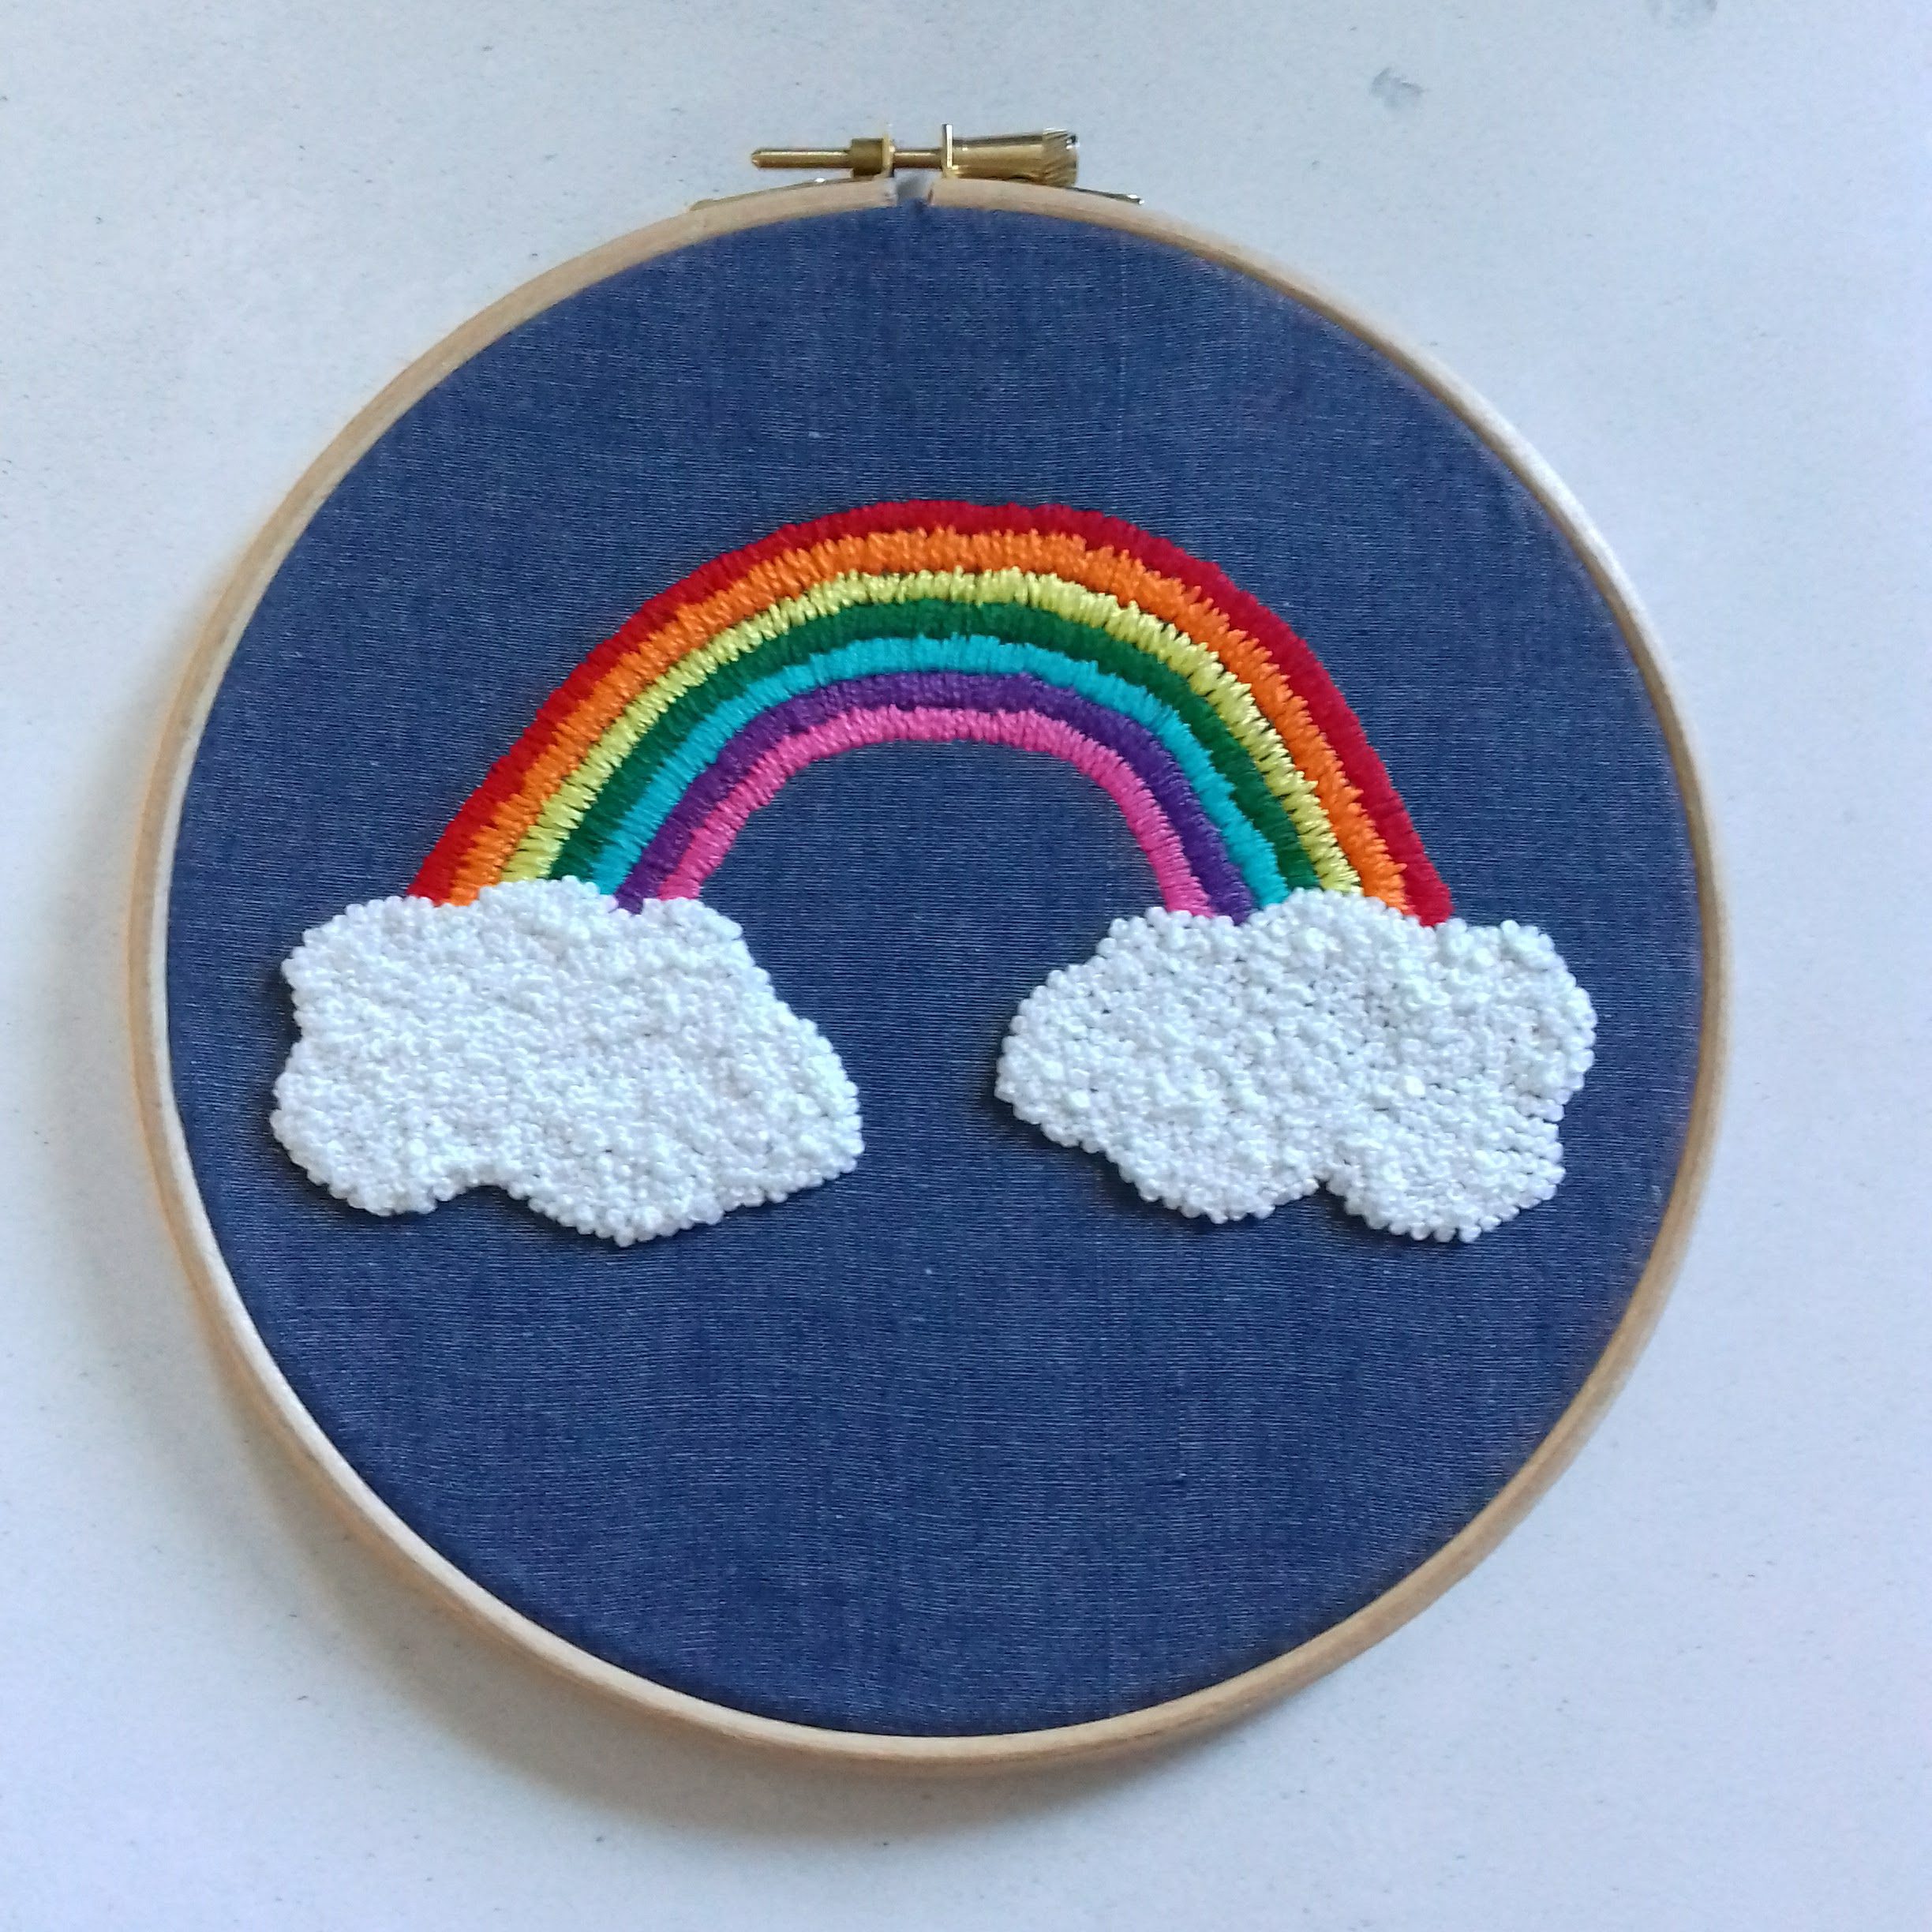
Use Satin Stitch to work your first colour of the rainbow. Start at one end and work all the way along to the other. You may need to tweak the stitches a bit at the start and finish to take into account the cloud shapes, by making them shorter or angled slightly differently.
Don’t worry if you don’t feel your stitches are especially even; this should be a fun and relaxing activity to help sooth your mind and foster a spirit of hope, so there is no getting it wrong.

Continue working each layer of the rainbow in Satin Stitch, using a different colour each time.

Next, switch to white thread and begin working your clouds using French Knots. I found a Triple French Knot worked best to fill the space, and it was helpful to create the edge of the clouds before filling them in. The French Knots give a lovely, fluffy effect.

Keep going, and eventually you’ll have finished your beautiful rainbow…

Don’t forget, if you love to sew you can join my Creative Sewing Challenge anytime to receive regular ideas and tutorials to inspire your sewing.
Happy sewing everyone, I really do hope as many people as possible find some creative sanctuary and positivity through this post.
And here’s a lovely pin to share – thank you!


