So I’ll admit, this is one of my favourite Christmas Sewing patterns I have come up with so far. These mini elf stockings are so cute and SO much fun to make. Whip up a couple each evening and you’ll soon have a tree full of colourful quirkiness that the humblest of elves would be proud of. These stockings are open to whatever stitches and trimmings take your fancy, so enjoy being creative with your choice of decorations; perfect for practicing different hand embroidery or using up whatever bits of ribbon, buttons and beads you have hidden in your stash.
You will need:
- Colourful felt
- Colourful embroidery floss*
- Embroidery needle
- Scissors
- Pins
- Thin ribbon (approximately 12cm per stocking)
- Tapestry needle (the eye needs to be big enough to thread your chosen ribbon)
- Optional – bells and beads
*use two strands of embroidery floss throughout (or try Perle embroidery thread).
- Cut out your pattern pieces. You’ll need two stocking shapes and two cuffs in contrasting colours.

2. Using a third contrasting colour, cut a few long and thin triangles. Don’t worry too much about being precise, these will be some quirky stripes for your elf stocking.

3. Lay your triangles across one of your stocking pieces. Arrange them in a quirky but pleasing fashion and pin in place once you are happy (remember, there is no need to be neat or precise!)

4. Use a matching thread to stitch in place using small running stitches. These stockings are supposed to have a homespun quality about them, so don’t worry too much about keeping your stitches neat or even (I’m sure the elves won’t mind).

5. Use the edge of your stocking as a guide, trim the excess felt triangles that now hang over the edge.

6. The next bit is really up to you. Use a contrasting thread to decorate your stocking with whatever stitches you fancy. I went for some small stars…

7. …then added some french knots to the cuff.

8. If you want to, you can repeat steps 2-6 for the other side of the stocking. I figured the reverse will either be facing a wall of the inside of the Christmas tree, so I didn’t worry too much about that (which just frees up time to make more of these little cuties).
Next, pin the cuffs to the stockings. Just remember to ensure the back is the facing the opposite direction to the front, otherwise they won’t pin together properly.

9. Use a row of small sunning stitches along the tops of the cuffs to secure them in place (again, don’t worry about being too neat).

10. Pin the front and back wrong sides together, and use a blanket stitch to sew together. You’ll need to lift up the cuff to sew the very tops of the stockings.
11. Continue blanket stitch all the way around the edge. Don’t forget to leave the top of the stocking open so you can add sweets and tiny gifts if you want to.

12. As an optional extra, you can add a jingly bell to the toe for a further splash of elf-authenticity.

13. Use a tapestry needle to thread some ribbon through the stitches at the very top corner of your stocking.

14. Then tie in a knot to make a loop ready for hanging.

And there you have it, your very own mini elf stocking. You can make as many and as varied number of these as time and imagination will allow. Have fun and enjoy using whatever stitches, trimmings and colours you fancy! For example…
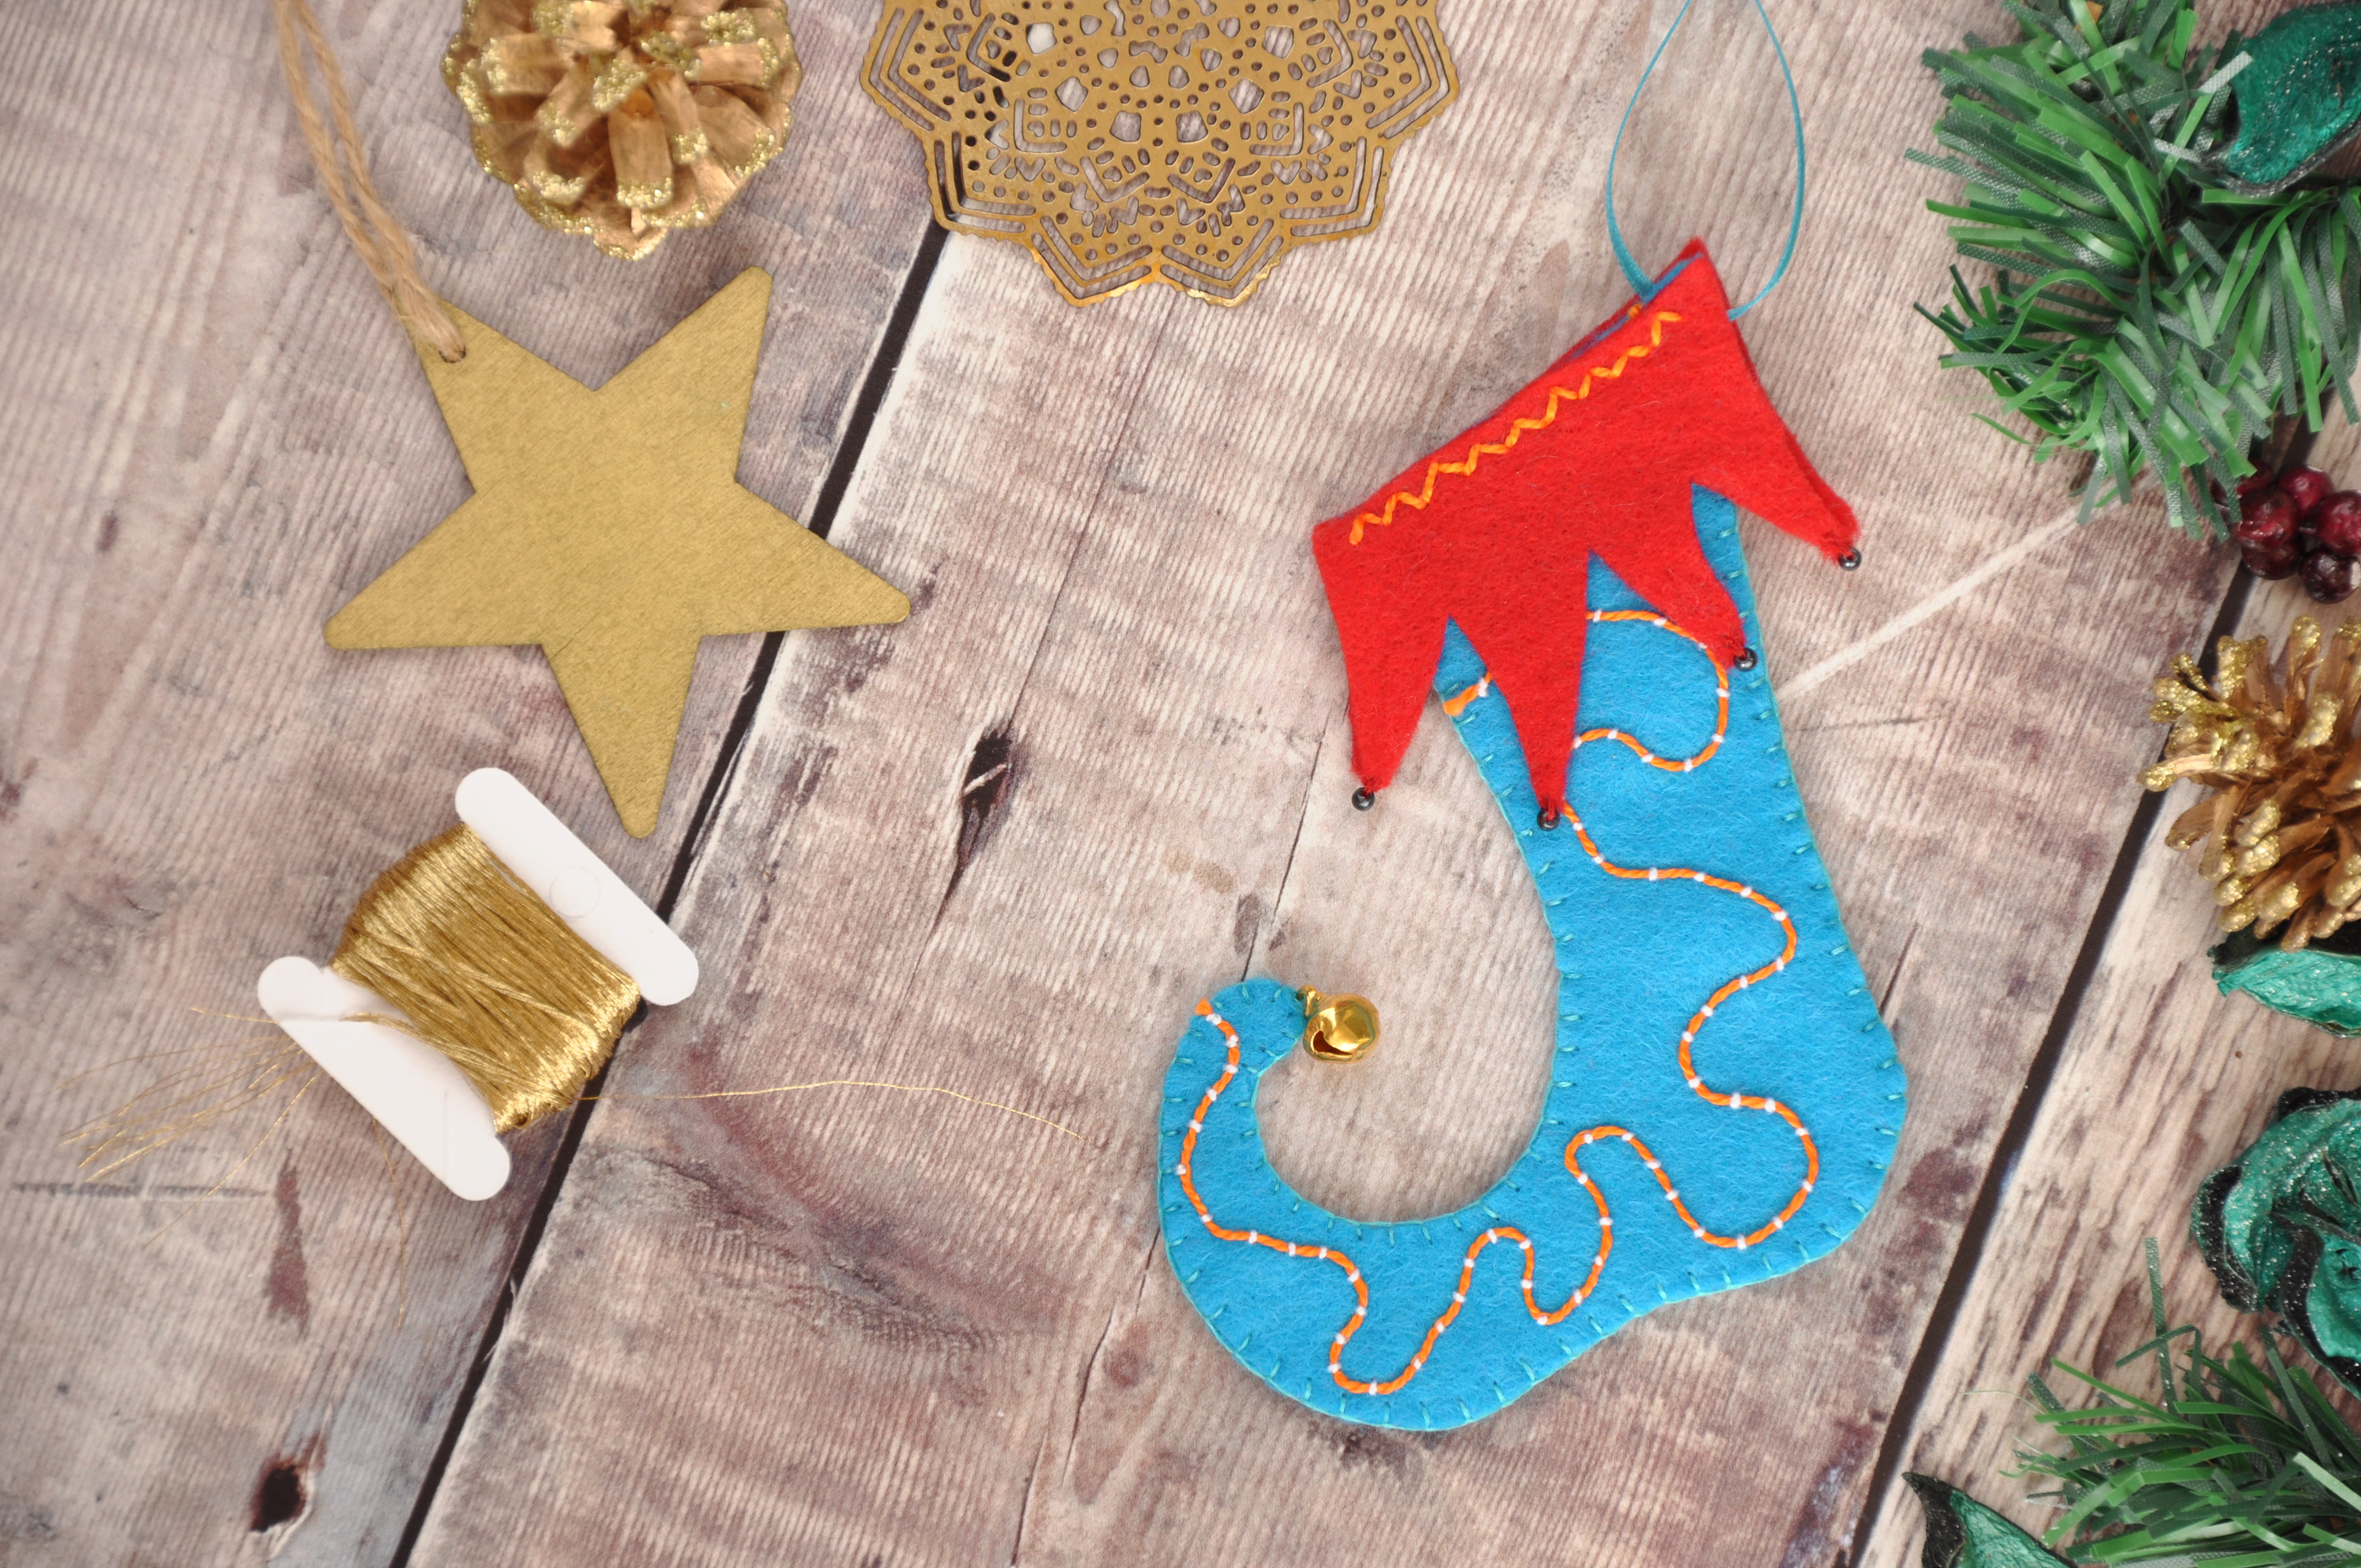
Here’s one decorated with couching and few little beads on the cuff…

I really hope you enjoy making these as much as I did. They are perfect for tucking little sweets and treats inside to hang on the tree, or you can go ahead and make 24 little cuties for your own mini-elf-stocking-advent- calendar (try saying that after a few glasses of sherry!)
And if you love to sew, you are very welcome to sign up to my Creative Sewing Challenge. Its a free and fun challenge to help keep this wonderful hobby on the agenda during our crazy busy lives. You get a prompt delivered to your inbox each month, along with a few ideas and bits of inspiration. Find out more here or sign up below.
The form you have selected does not exist.
And here’s a handy pin for later! Join me tomorrow for a complimentary tutorial; mini elf hats!


