As a follow on from my Felt Heart activity published yesterday, I’m continuing the theme of sewing with children this week by sharing some new ideas each day. Today, I wanted to document another introductory sewing activity I’ve tried with my daughter, which seemed a natural progression from the free and unrestricted felt hearts by using perforated card as a base. My daughter tried this out when she was four, but its a great one for primary children of all ages as you will see.
You will need:
- Perforated card (you can get these in a variety of colours)
- Embroidery floss
- Embroidery needle
- Scissors
As ever, don’t forget to maintain close supervision with young children when using scissors and needles and pins.
So, starting with how to use this activity with primary-aged children (I’ll focus on developing this for younger children towards to the end of the post); begin by cutting your card into a tag shape – don’t go for anything too large (its tiring to fill with stitches) or too small (it can get a bit fiddly).

Next, encourage your child to draw a pattern, or series of patterns to follow.

Allow your child to choose the color of their embroidery floss. Using 6 strands, tie a knot and do a small back stitch at the start of their pattern (older children will be able to do this themselves, younger children might benefit from you starting them off in this way).

Repeat the back stitch by over-sewing the stitch you just made, it all helps to keep your sewing secure before you start.


Now your child can begin to stitch along the lines they drew, using either back-stitch or running stitch (the latter is probably easier for younger children). The following photos give you a step by step guide to back-stitch if needed…
Starting from the back of your work, bring your needle up through the next nearest hole…

Poke your needle back through the preceding hole you just came from and gently pull your thread through to make the stitch…

Repeat the process by bringing your needle up through the next hole…

…and back through the hole you just came from…

Repeat and keep going…

…and keep going…

…and keep going until you have followed all the previously drawn lines.

Finish by over-sewing your final stitch…

Then, on the reverse side of your tag, thread your needle through the stitches to make a loop…

…pass your needle back through that loop…

…and draw your thread tight to make a knot.

Repeat this process if desired for extra security, the thread your needle through a collection of stitches…

…pull your thread through…

…and finally cut the end.

Your design is complete!

Finally, cut a separate piece of thread (approximately 10-15cm), bring through a hole at the very top of the tag and secure with a knot to make a loop.

Your tag is complete!

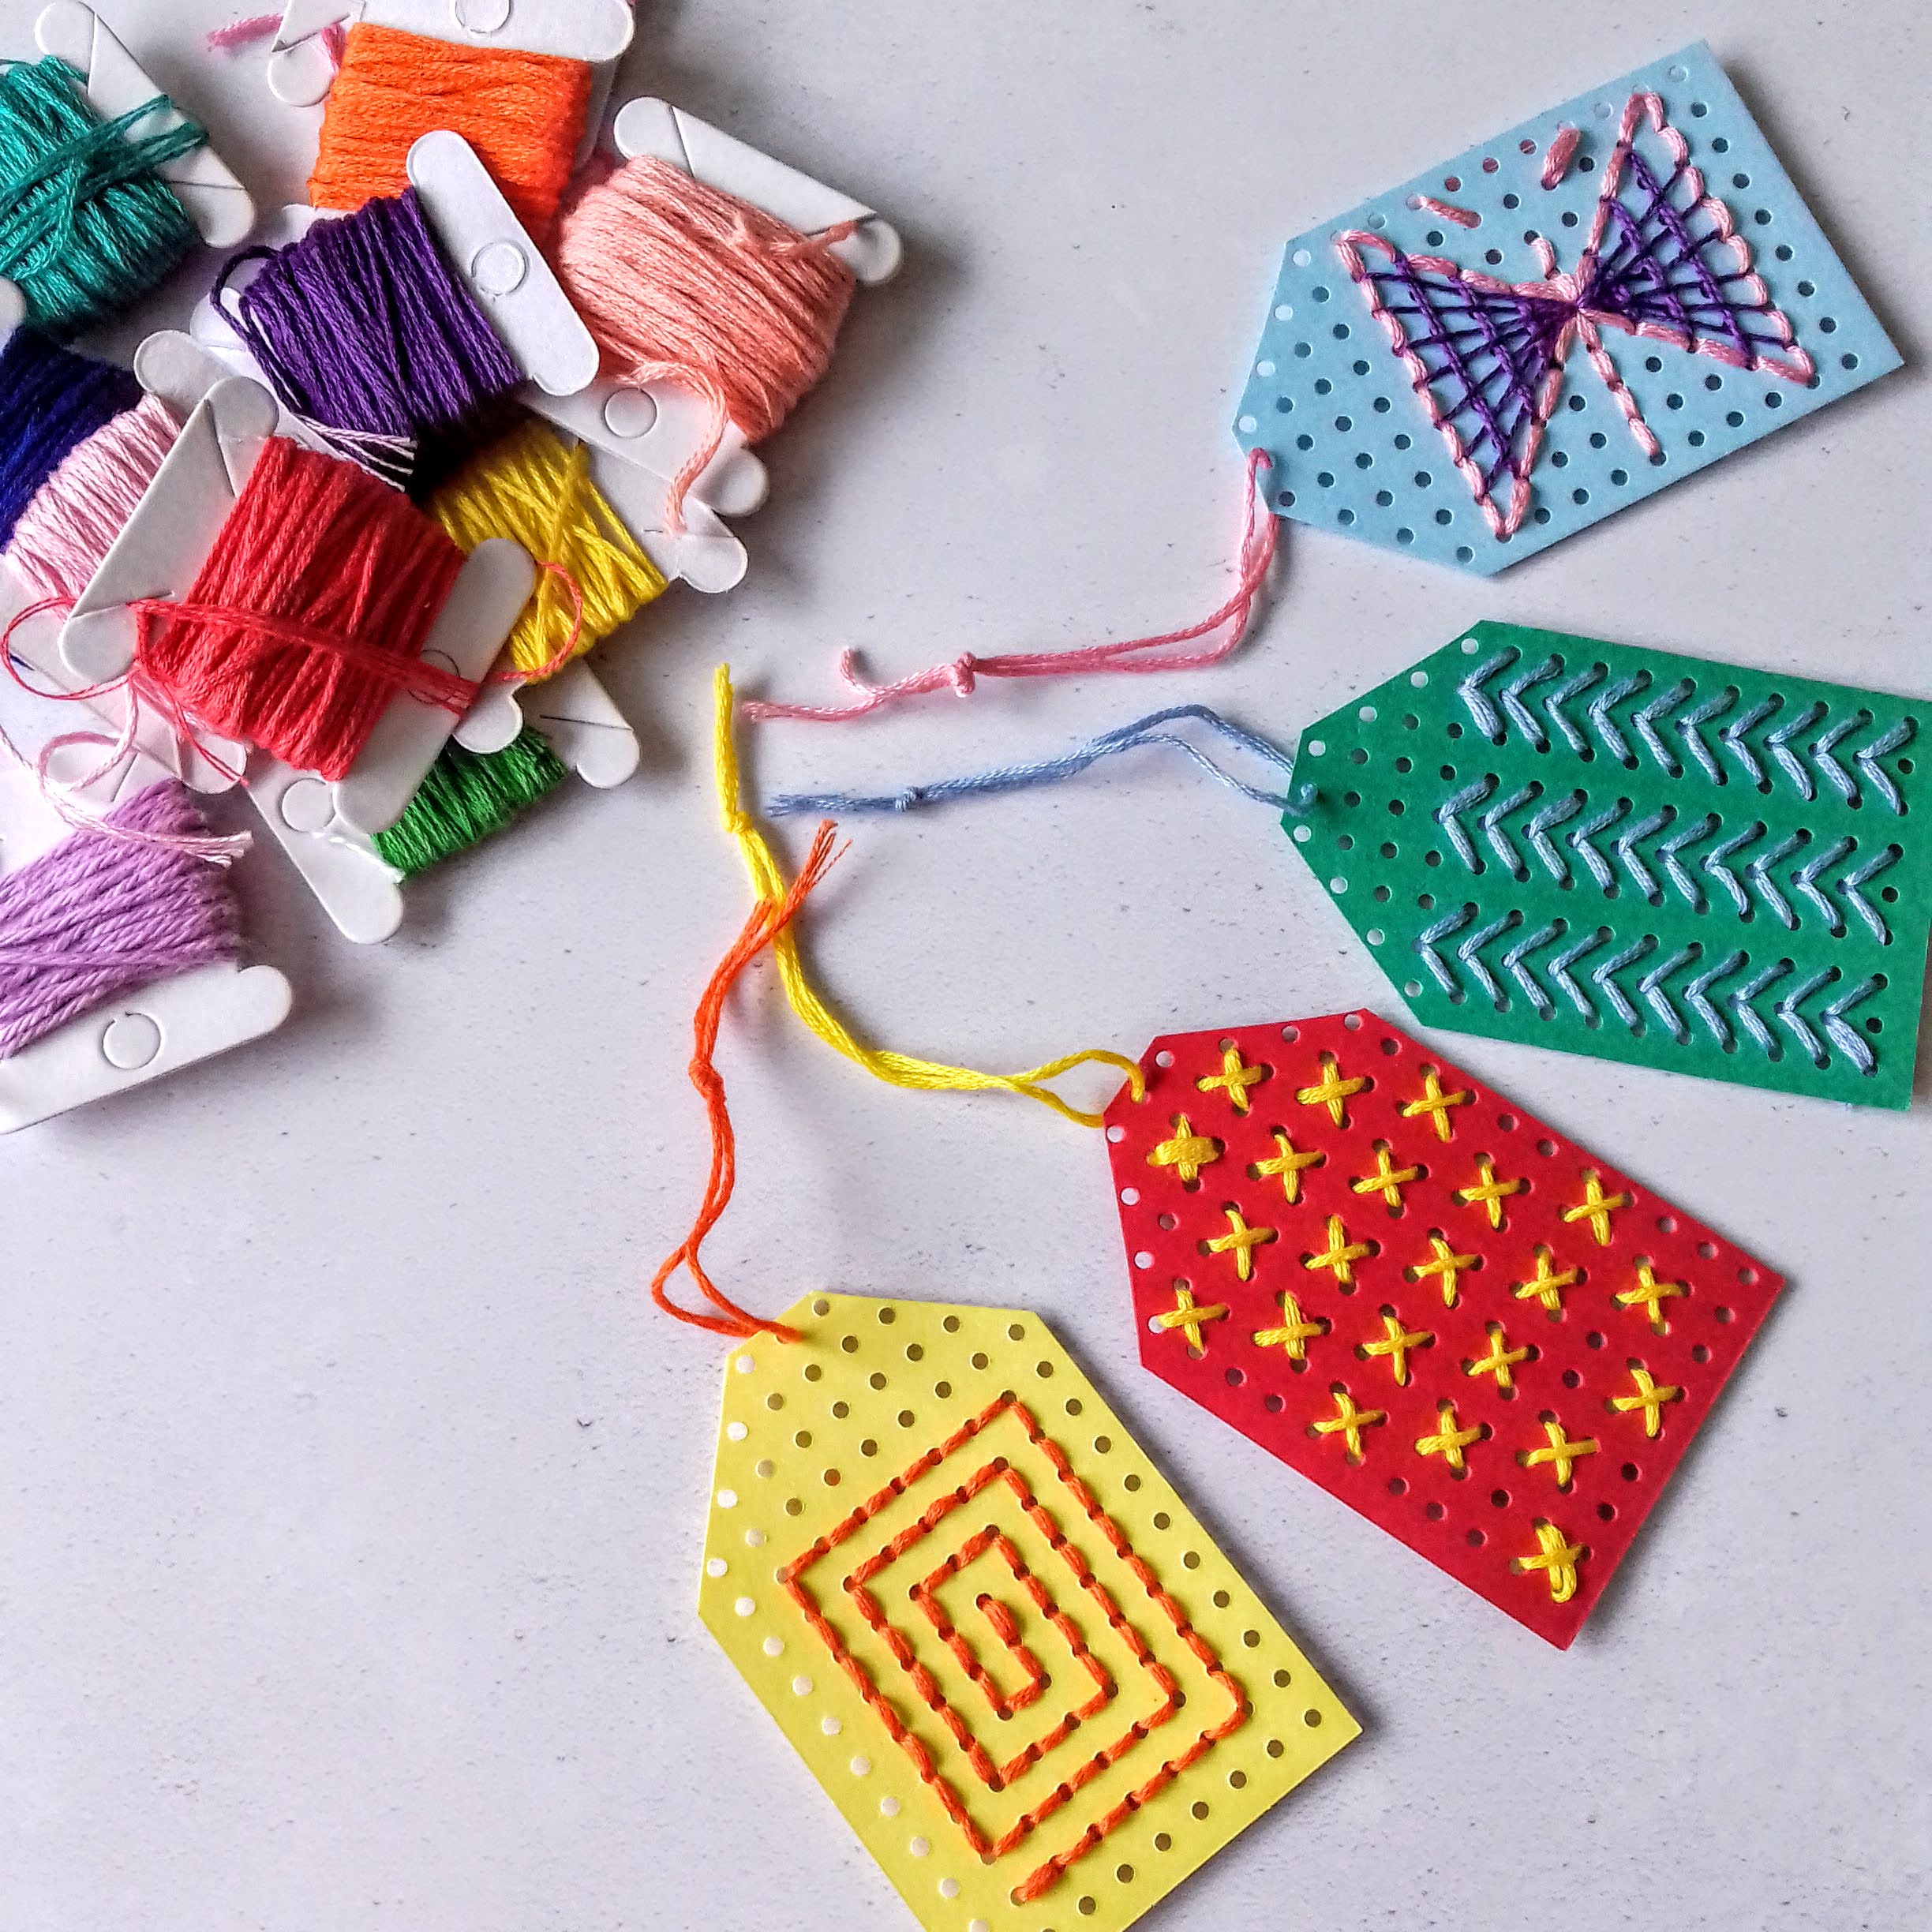
Once children get the hang of this, there is no limit to the creative possibilities of how they might choose to sew their gift tags. For example, by using different stitches such as cross-stitch…

…or herringbone stitch…

…or older children may want to mix it up completely and create a design with several different colours and types of stitches.

As an extension to this activity with older children, you might want to:
- Photocopy your perforated card so they can draw their design out first
- Research different artists and textile artists that incorporate geometrical patterns into their work
- Get out and about to capture patterns you see and might want to recreate (either with a sketch book or camera)
- Create matching gift cards to compliment the tags – you may want to explore the possibility of a range of designs that sit within a certain theme (a ‘snowy day collection’ or a ‘wild flower collection’ for example)
And I mentioned this activity has also been a hit with my 4-year old. Now don’t panic, she isn’t doing any of the above just yet! But having invited her to choose her card and thread colour, I let her cut the card to the shape she wanted (a great opportunity to practice her scissor control)…

I then threaded up the needle and got her started, before handing over to let her sew as she fancied. At this age, its less about following a pattern and more about getting to grips with passing the needle back and forth to make stitches anyhow and anywhere.

As with the Felt Heart activity, my intention was to let my daughter go wherever her needle took her, and just a few stitches was absolutely enough to be a valuable experience. But the pre-punched holes, I think, introduced a touch more precision and control, so moving her skills on slightly.
The finished piece – I may well attach this a its own tag as a gift card for family:

All in all, a diverse activity that holds much potential for creative development, mastery of sewing skills, and generally having fun across a wide age-range.
And if you yourself are reading this because you love to sew, why not nurture your own creative development by signing up to my Creative Sewing Challenge? Our community uses a creative prompt to sew a new project each month, and I share ideas and tutorials tied to each theme for further inspiration. Find out more here or sign up below, we’d love it if you could join us!
The form you have selected does not exist.
And please do share my pin – thank you!


