
Everyone loves a tote. In my opinion they are like pens and scarves; you can never have enough. This particular design was inspired by winter trees, the theme of my Creative Sewing Challenge this month. If you’d like to take part in the future, sign up below for free and receive monthly prompts and ideas to inspire your sewing. Its free, fun and open to anyone!
The form you have selected does not exist.
And now on to the tutorial, you will need:
- Plain fabric (nothing too thin or light)
- Fabric paint (I used white and brown – made from red and blue)
- Paintbrushes
- Kitchen scourer sponges, the kind with an abrasive side
- Craft scissors or knife
- Newspaper or similar (so your paints don’t mark your table)
- Paper plate or similar (for dabbing sponges into paint)
- Pen and ruler
- Fabric scissors and pins
- Thread to match your fabric, plus white, grey and red
- Sewing machine
Prepare your fabric; cut 2 squares, 39cm by 39cm (these are for the body of the bag) and 2 rectangles 50cm by 7cm (these will be the handles).
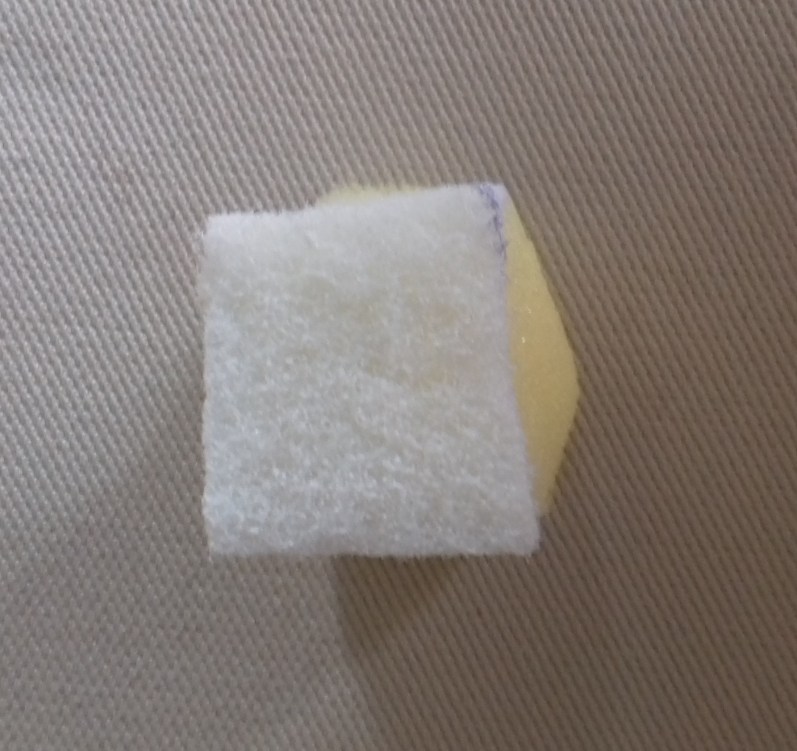
Now to decorate! Draw a long triangle on your sponge (isosceles if you want the official term). I found marking a point half way across the top of my sponge then drawing two diagonal lines to each corner gave me the right shape.

Cut out.

Use the remaining bits of sponge to make some smaller, more iregular shaped triangles…

…and a little rectangle for a trunk.
Put some newspaper underneath your fabric as the paints can seep through and discolour your table (I found that out the hard way!) Cover your biggest triangle in white paint and print onto your fabric. I found painting directly onto the rough part of the sponge gave the best effect.

Repeat the process with each of your triangle shapes, spreading out a mix of large and small. Create a line of triangles across the lower part of your fabric. Remember to steer clear of the very edges of your fabric piece as these will form the seam.

Using brown paint (or a mixture of red and blue), paint your rectangle and print a trunk for your larger trees. I also painted a small strip of my triangle sponges to create trunks for my smaller trees (saved cutting out teeny tiny rectangles…left a bit of a white splodge in the mix but I kind of liked that!)

Once dry, fix your paints following the manufacturer’s instructions (this usually involves applying heat). You can now make up the bag. An optional extra stage is to create some additional texture by using hand or machine embroidery to sew some patterns over your painted areas. I used a cute little flower stitch on my machine to add some grey and white snowflakes, and a red running stitch to pick out the shape of the trunks.

Pin the body of your bag right sides together and stitch around each side and along the bottom. Use a 1.5cm seam allowance, and make sure you keep the top open. Press and finish your raw edges (I just used my pinking sheers to neaten up).

Press your handles in half length ways, pin and sew using a 1cm seam allowance. Use a safety pin to turn each handle right side out and press again.

Keeping the bag inside out, fold over the top edge by 4cm and press.

Lift the top edge of the bag back up again, re-fold and press, this time to the fold-line you have just created. You should be folding over by 2cm.

Now fold your fabric back under, using the fold line you have just created. You will have a neat, 2cm hem with all your raw edges tucked under. Tuck your handles under this hem, approximately 8cm from each edge. Jiggle about as needed to make sure they look even, and pin in place.

Sew a line of running stitch around the top of your bag, as close to the inner side of your folded edge as you feel comfortable with. You will be securing the handles in place as well as hemming the top of the bag.

Turn your bag right side out. Fold the handles back on themselves so they are now in the correct position, and pin in place.

Stitch a small square at the bottom of each handle to secure them in place, using your line of existing running stitches to complete the bottom of the square if possible (this just keeps it looking neat).

Give the bag a final press and there you have it, a lovely wintry tote for when you are out and about in those cold months (and once spring arrives, you can come up with a whole new design to make another!)

Don’t forget, sign up to the Creative Sewing Challenge today for regular ideas and inspiration to keep your sewing fresh.
The form you have selected does not exist.
And here’s a handy pin for later…


