
July’s theme for my Creative Sewing Challenge was ‘Flamingo’. I knew I wanted to create something bold and beautiful to reflect this theme, and was inspired by the many flamingo-related quotes I came across. So I created this Embroidery Hoop Design. Download the free flamingo pattern below, and read on for simple step by step instructions to sew your own.

But before you do! This whole project was inspired by my Creative Sewing Challenge, open to anyone who loves to sew. Its a great source of ideas and inspiration, suitable for all types of sewing genres and abilities. You receive a creative prompt each month, and plenty of ideas to try out. Find out more here or sign up below:
The form you have selected does not exist.
For this project you will need:
- 18cm – 20cm embroidery hoop
- Black embroidery fabric
- Bright pink fabric for your flamingo applique
- Light pink embroidery floss
- Pins and embroidery needle
- Tacking thread
- Tailor’s chalk
- Trace and tear and a pencil
- Bondaweb (or similar heat and bond product for applique)
- Iron and ironing board
Begin by drawing around the flamingo shape onto bondaweb. You’ll be drawing on the paper side, so make sure the ‘sticky’ side of the bondaweb is face down. Remember, your bird should be facing the wrong way at this stage. Roughly cut around it.

Place your flamingo onto your pink fabric (sticky side down). If your fabric has a right and wrong side, make sure you have placed your flamingo on the wrong side. Follow the manufacturer’s instructions to bond in place (this usually involves pressing with an iron for short periods of time).

Cut out your flamingo.

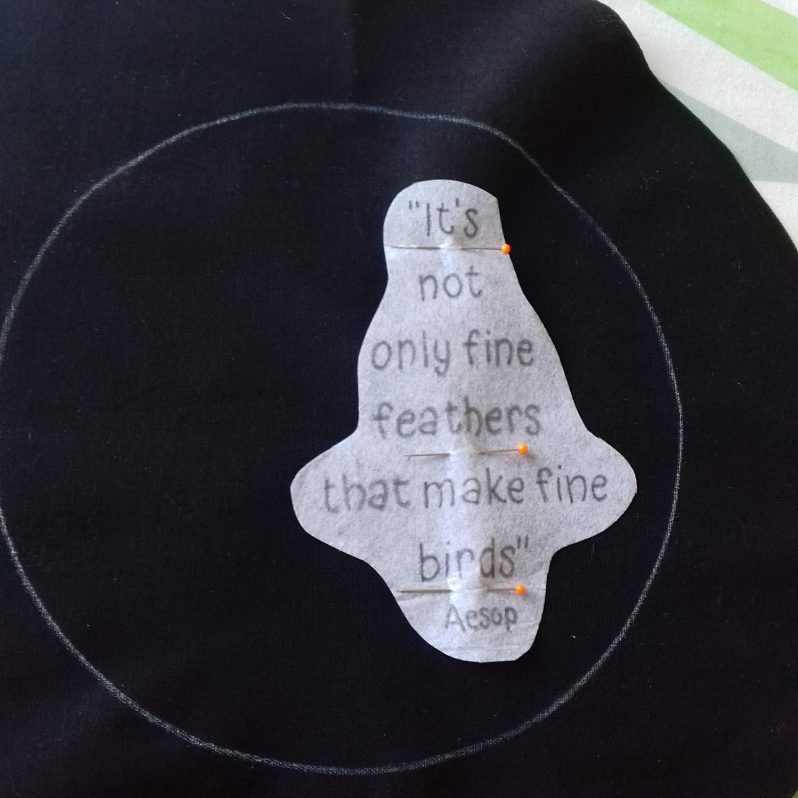
Now trace the quote onto some stitch and tear. Again, roughly cut around it.

Use tailor’s chalk to draw round the smallest circle of your embroidery hoop onto your black embroidery fabric. Roughly cut around it, leaving approximately 5cm of fabric all around the circle.

Position your flamingo and the quote side by side on the fabric. Jiggle them about until you are happy with the position. A few things to look out for are; don’t put either piece too close to the edge of the circle, make sure your flamingo is standing nice and straight, and don’t forget, its ok for the edge of your stitch and tear to over-lap slightly with the flamingo if needed – its the words underneath that need their own space.

Once you are happy, pin your quote in place.
Peel the backing paper off of your flamingo shape, and add it back into the circle – again, make sure he’s nice and straight – before securing in place with an iron (once more, referring to the manufacturer’s instructions).

Tack your quote in place and remove the pins.

Now trace the detailed picture of the flamingo onto some trace and tear. You don’t need to worry about the legs, you are just trying to capture the wings, beak and eye.

Place your traced flamingo on top of your applique shape, carefully lining up the edges so its nice and accurate. Pin and tack in place.

At this point you need to remove your tailor’s chalk circle – I found gently rubbing it with a damp cloth worked best. Leave to dry, and then place your fabric in your embroidery hoop, taking care to make sure your design sits nice and central once more. (But if you want to decorate your outer hoop as I have done its best to do that first – follow my tutorial here to find out how I added the polka dot bias binding).
Next, use your light pink embroidery floss to stitch the flamingo details, sewing through the trace and tear as you go. I opted to use a small back-stitch for this, but split stitch or a very small running stitch could work. And I did a french knot for the eye.

Remove the trace and tear to reveal some simple but effective embroidered detail on your flamingo.

Now stitch your words, once more sewing through the stitch and tear. I found a small back-stitch a good choice again here.

Remove the stitch and tear and your final design is revealed!

Neaten up the edges of your hoop in whatever way you prefer. I trimmed the fabric down and used craft glue to secure the excess to the underside of my hoop. I also added a felt backing – you can follow my tutorial to do both here.

You might also have noticed the natty pink polka dot finish on my outer hoop – if you’d like to do something similar find out how here.

And there you have it, a pretty-in-pink piece of inspirational hoop art, conveying wisdom and beauty to whoever encounters it. A potential lovely addition to a child’s bedroom (my daughter as usual has quickly claimed this as her own), or something uplifting to hang by your mirror to give you a boost on those ‘bad hair’ days.

I hope you enjoyed this tutorial, and I hope you’ll consider joining the growing community that is part of my Creative Sewing Challenge. The inspirational world of sewing is without limits, and its lovely to share in this together:
The form you have selected does not exist.
And here is a funky pin for a rainy day!


