
I’ve been enjoying designing and making embroidery hoop art for a while now, particularly since I launched my Creative Sewing Challenge. But I thought it was time to focus on the hoop itself, and how that too can be prettied up to add to the finished product. The tutorial below takes you step by step through the process of covering a hoop using bias binding and glue. This is just one of several methods you might want to try – it certainly helped give my finished Flamingo Embroidery Hoop Art an extra bit a flare!

You will need:
- Embroidery hoop
- Single fold bias binding – this needs to be wider than your hoop so that it can wrap around comfortably. Mine was 3cm wide
- Craft glue – this needs to be suitable to fabric and wood, with a fast hold. It’s worth getting higher quality glue for the most effective result.
- Paintbrush and pot for your glue
- Pegs – or similar, to hold your bias binding in place
- Tape measure
- Scissors
- Damp cloth and small towel – not essential, but it helps to be able to wipe your fingers as you go along in case they get sticky
Start by measuring the outside of your hoop, all the way around the outer edge. Note, this is not the same as the hoop size itself. Now cut your bias binding to be slightly longer, so you are confident it will wrap all the way around.
Paint some glue to a small section of your hoop; along the top, round the edges and underneath.

Making sure you’ve cut the edge of your bias binding nice and straight, place it right against the screw mechanism at the top of your hoop, and stick the bias binding down. Ensure it sits nice and evenly along the hoop, and tuck the edges underneath.

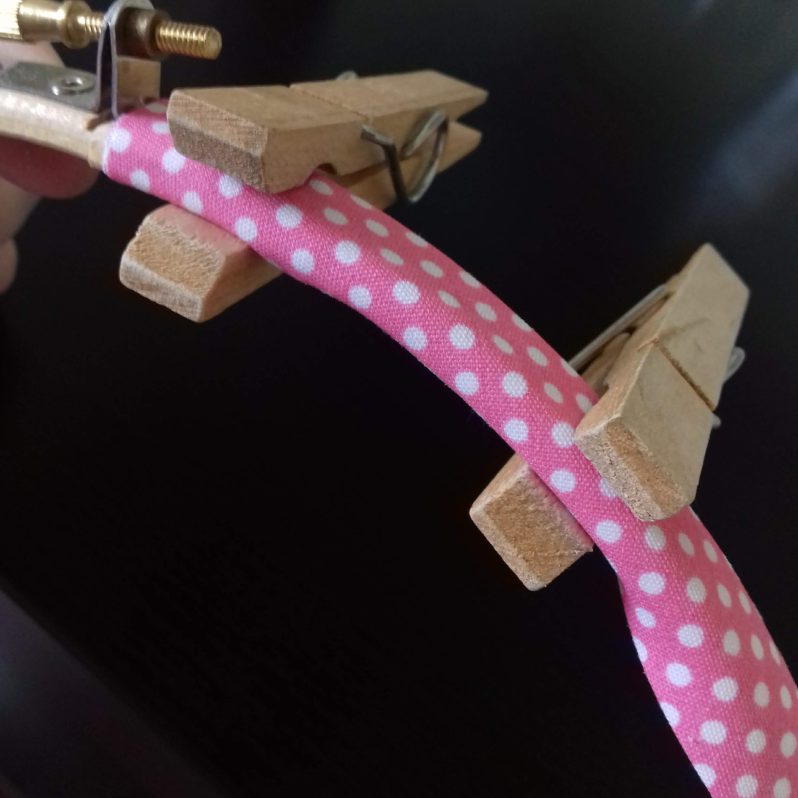
Flatten the bias binding down, and secure in place with a peg.

Flip the rest of the bias binding back over the peg to reveal a bit more of the hoop, and repeat the process by adding some glue to the next section (remember, you want to coat the top, sides and underneath).

Lay some more of your bias binding along the hoop, and keep making sure it stays nice and even.

Fold the edges under. Make sure they are lying nice and flat so the glue can really take hold. This is where your fingers will probably get sticky, so having that damp cloth to hand will allow you to keep wiping them rather than get glue on your lovely bias binding as you work.

Peg in place, and move along to the next section.
Continue to work your way all around the hoop, until it is completely covered. When you get towards the last section, carefully trim the end of your bias binding so it lies nice and flat next to the screw mechanism (you might need to trim and test a few times to get it to the perfect length).
When the whole hoop has been covered, do a final check to make sure the bias binding is lying flat all the way around, and I found it helps to position your pegs in different directions to hold it in place evenly. Then leave for a while to let the glue dry properly and do its thing. Some craft glues are quick to bond but slow to dry, so its worth leaving as long as possible.

When you are happy the glue has stuck firmly, remove your pegs and your hoop is ready for use. Now your frame will be as beautiful as your embroidery, and if you plan carefully can really add to your finished design (it was no coincidence I chose pink polka dots for this hoop as I knew it was destined for my Flamingo Hoop Art project – the tutorial is here if you’d also like a go).

And if you love to sew, you might enjoy being part of my Creative Sewing Challenge. You receive a creative prompt at the beginning of the month, and our community finds new and interesting ways to interpret this theme through our sewing (you may have guessed, our prompt for this month was ‘Flamingo’). Find out more here, or sign up below – all sewing types and abilities very, very welcome:
The form you have selected does not exist.
And here is a lovely pin – thank you for sharing!


